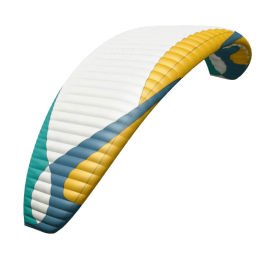
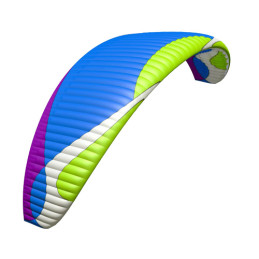
Choosing your equipment should be a thoughtful process based on specific criteria. While manufacturers clearly specify on their websites who their wings are designed for, here’s a quick recap to help you with your purchase.
The previous article discussed the mindset behind choosing a paraglider and the selection criteria. I invite you to read it here.
Now, here’s a guide to selecting the right wing based on the main criteria:
1 - Certification Level
Along with the wing’s size, this is the most important criterion. It’s pointless—and dangerous—to fly with a wing that’s too advanced for your skill level.
You can easily spot people who let their ego pick their wing: they have a race-level glider, yet they stay on the takeoff site claiming it’s “too strong,” while pilots with EN B wings are soaring in the air.
The goal is to get airborne safely without getting bored. Every pilot’s paragliding practice should fall between these two extremes. Beyond good flying conditions, choosing a wing suited to your level is essential.
The table below, created with input from experienced instructors and gear retailers, outlines possible choices based on your skill level. This is how a school director would help you pick the wing best suited to your abilities.
We’ve divided pilots into two categories: those flying for less than 3 years and those with more experience.
Once this choice is made, consider your annual flying volume from the previous year. Ground handling hours aren’t included but are implied. They account for about 10% of the average pilot’s yearly flight time and up to 100% for someone passionate about handling (equal time spent ground handling and flying).
Example:
“I’ve been flying for 4 years and logged 50 hours last year… which category should I choose?”
This pilot could opt for an EN C-certified wing, especially if they frequently practice ground handling.
Okay, the category is set.
2 - Weight Range Certification
Directly tied to the wing’s size, the weight range is determined by the manufacturer for a given surface area. Each size varies by brand and year. To choose the right wing, you need to not only fall within the weight range but also position yourself well within it. A wing behaves slightly differently at the top or bottom of its range.
-
A pure hike-and-fly setup weighs between 3 and 7 kg.
-
An everyday setup weighs between 8 and 15 kg.
-
Acro or cross-country competition gear can weigh around 20 kg.
Example:
Take a wing with a weight range of 85-105 kg, referring to the total flying weight (PTV). This is the pilot’s weight on a scale with their paragliding bag. You should account for about 15 kg of gear in total added to your body weight.
So, this wing would suit a pilot weighing 70 to 90 kg—but there’s more to it.
A 22-year-old, full of energy and quick reflexes, weighing 71 kg might find this wing boring. Meanwhile, a 55-year-old family man weighing 88 kg might find it too reactive and fast. See where I’m going with this?
Here’s a summary of how to choose the size:
-
Bottom of the range: Slower, more damped wing with a slightly lower sink rate. Ideal for a calm pilot or flying in light conditions.
-
Top of the range: Faster, more lively wing with a slightly higher sink rate. Ideal for an energetic pilot or flying in strong conditions.
The difference in sink rate is almost imperceptible between a fully loaded or minimally loaded wing. However, horizontal speed can vary by nearly 5 km/h.
What happens if you’re outside the weight range?
It’s not recommended, but it’s not a disaster either. The wing just hasn’t been certified under those conditions—it’ll be extremely slow and sluggish below the range, and ultra-dynamic above it.
3 - Brand and Price
This is a subjective criterion. If you choose a recent wing suited to your practice using the tools above, you can’t go wrong: major brands only make good wings. For new gear, the launch year is an important factor—opt for the most recent model possible. Brands typically renew their models every 3 years or so.
4 - Choosing a Second-Hand Wing
In the second-hand market, focus on wings less than 15 years old. Beyond that, you’ll mostly find outdated models.
The wing you choose should have undergone a material strength test if it’s over 3 years old—this is the paraglider’s “technical inspection.” Line geometry checks are less critical for EN A, B, or C wings, or DHV 1, 1-2, and 2 categories, as significant geometry changes mainly affect elongated, high-performance wings or acro wings.
Refer to the wing selection guide and ask the seller for the material test results.
I hope this guide helps you better choose your next paraglider. Feel free to contact me or leave a comment if you have any doubts.
Happy flying, and remember: the joy is in being airborne, not in owning a wing!


